Create First ASP.NET MVC 4 Web Application :
This article will describe you how to create your first simple ASP.NET MVC 4 Web application, which will display “Hello World” to the user.Please refer this to know what is ASP.NET MVC4.
After you have installed ASP.NET MVC 4 (which is packaged with Visual Studio 2012 ) or to work with Visual Studio 2010,you can start creating new ASP.NET MVC 4 projects.
To start creating a new project, follow these steps .
Step 1 : Create a new project
Open Visual Studio (2010, 2012, or Express) and choose FILE ➤ New Project as shown in figure 1.1.

Fig- 1.1 : Creating a new project in Visual Studio
Step 2 : Select Asp.Net MVC 4 web Application and give the Name and Location for the Application
In the New Project dialog, navigate to Templates ➤ Visual C# ➤ Web and select ASP.NET MVC 4 Web Application, name the project as MvcDemoApp andleave the other options at their default values, and then click the “OK” button , as shown in Figure 1.2 .
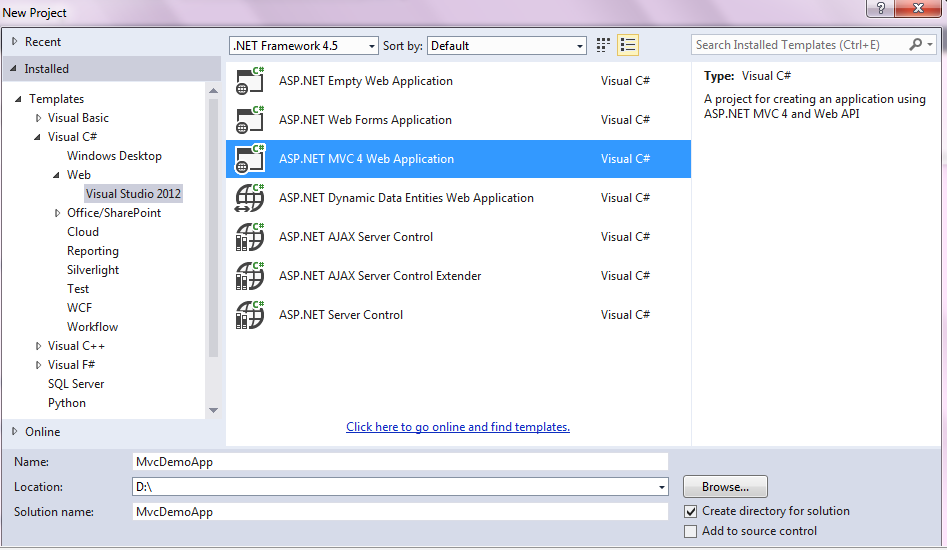
Fig – 1.2 : Creating an ASP.NET MVC 4 web application
Step 3 : Select Project Template to begin with
In the New ASP.NET MVC 4 Project dialog, select the Empty Application template(to begin from scratch), select the default Razor view engine from the drop-down menu,we can check the “Create a unit test project” check box(will look into this in detail later) as shown in Figure 1.3.
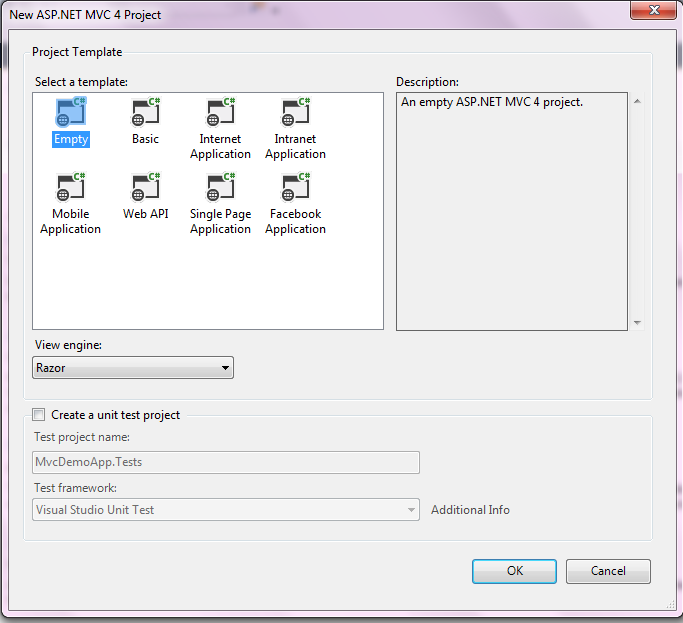
Fig- 1.3 :Settings for the new ASP.NET MVC 4 web application project
Step 4 : The Empty project will be open which is shown below
Click the “OK” button. Visual Studio will create the application, after which you will be ready to start building the functionality for the application.
Now, Our new solution will look like ,as shown in fig-1.4 .

Fig – 1.4 :ASP.NET MVC 4 web application
Step 5 : Add Controller
Now Right click on the “Controller” folder and then select Add-->Controller. A pop-up will be open where you give the appropriate name with suffix as a controller,let's name it as HelloWorldControllerand click the add button,as shown in fig-1.5 .
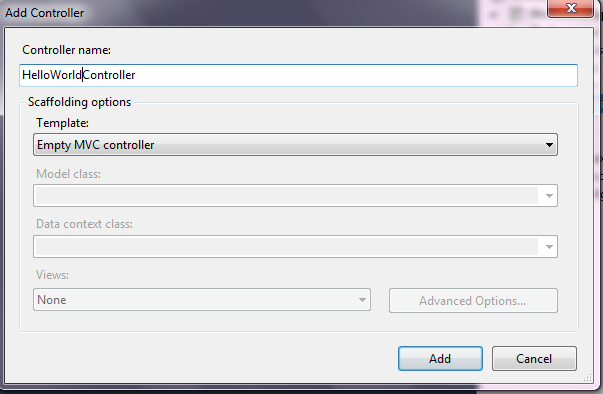
Fig -1.5 : Add Controller
Once you add the new controller you should see some kind of code snippet as shown in fig-1.6 . Where ,
- Controller is nothing but a class
- ActionResult is return type of "Index" action method
![]()
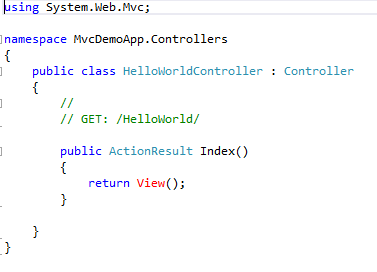
Fig : 1.6 : Code snippet after adding controller
Step 6 : Add View
Now, we will add the view for our controller. To do that open the “HelloWorldController”. Right-click on the "Index"action method and click on "Add View", as shown in fig-1.7 .

Fig-1.7 : Add View
Here , we can notice that view name is default as “Index”(same as controller action method), Default view engine is “Razor” and “Use a layout or master page” check box is checked by default (which will allow view to inherit master page automatically) .
Step 7 : Glance of View
Here we can notice, “Index.cshtml” file is created inside the “HelloWorld” folder which is inside the “Views” folder, as shown in fig -1.8 .
Where “Index” is the controller action method and “HelloWorld” is our controller name. In “Index.cshtml” the extension .cshtml indicates ASP.NET Razor C#file type .
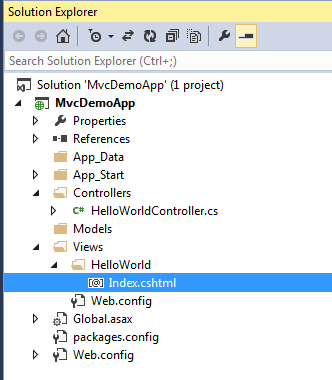
Fig – 1.8: Glance of View
Step 8 : Code snippet of View
Once you add the view you should see some kind of code snippet as shown in fig-1.9 .

Fig – 1.9 :Code snippet of view
Step 9 : Type HelloWorld And Run the Application
After adding the view open the source and add your design. I will add one simple line in it, "Hello world! This is my first MVC application", as shown in fig – 1.10.

Fig- 1.10 : Hello World Mvc web application
Now, If you do a CNTRL + F5 to run the application, you should see an error as shown in the below figure. This error is obvious because we have not invoked the appropriate controller / action.
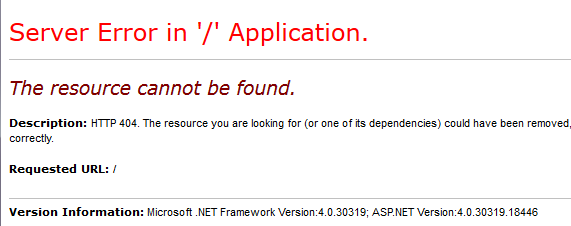
Fig – 1.11 :Server Error
Step 10 : Here you go : Your First "Hello World" MVC Application
This is our final step . To resolve the above error , Open the RouteConfig file and set the default Action to open.

Fig – 1.12 : Open RouteConfig class
In RouteConfig.cs , change the default controller from “Home” to “HelloWorld” as shown in fig -1.13 .
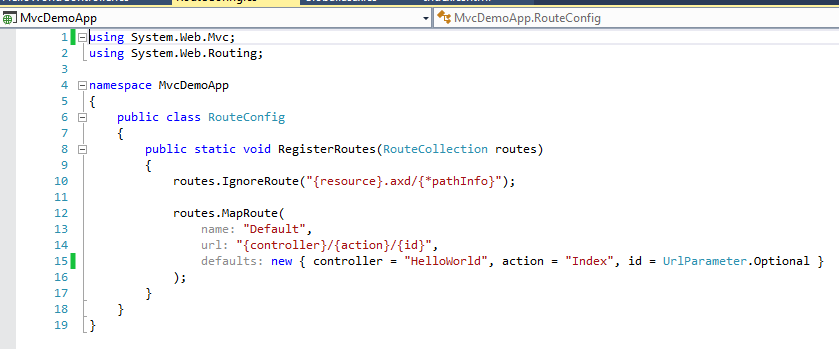
Fig – 1.13 : Modify RouteConfig.cs file
Now press F5 and run the application.
Here is the output.
Here is the output.

Fig : 1.14 : Output
Hope this will help to create your first ASP.NET MVC 4 web application.
Happy Reading :-)